Playmaker Basics
by Archive User
- February 10
- in
The basics of Playmaker
First, install Playmaker
- Download from class server
- IMPORTANT! Double-click the version for your version of Unity (5.3). DON'T drag the whole thing into your project.
- In the popup, click the Install Playmaker button. Make sure the compatibility check is OK.
- When installed, a new Playmaker menu appears at the top of the program.
- Choose Playmaker > Playmaker Editor. If you don't see that and see Install again, go through the installation progress again until you do.
- You can move the Playmaker project pane where you want in your workspace. I put mine next to the Project tab.
- Click on the object you want to make interactive. We’re going to use a treasure chest.
Prepping your animations
A lot of objects in the Unity asset store have animations that were created in previous versions of Unity. These are called Legacy Animations.
- Click on the treasure chest and look in the inspector. At the top you’ll see Model. Click the Select button there, then Rig. Change the Animation Type dropdown to Legacy Animation.
- Add a box collider to the treasure chest and check the "Is Trigger" box.
- Increase the size of the collider so that it extends a few meters beyond the object.
Add an FSM and some states
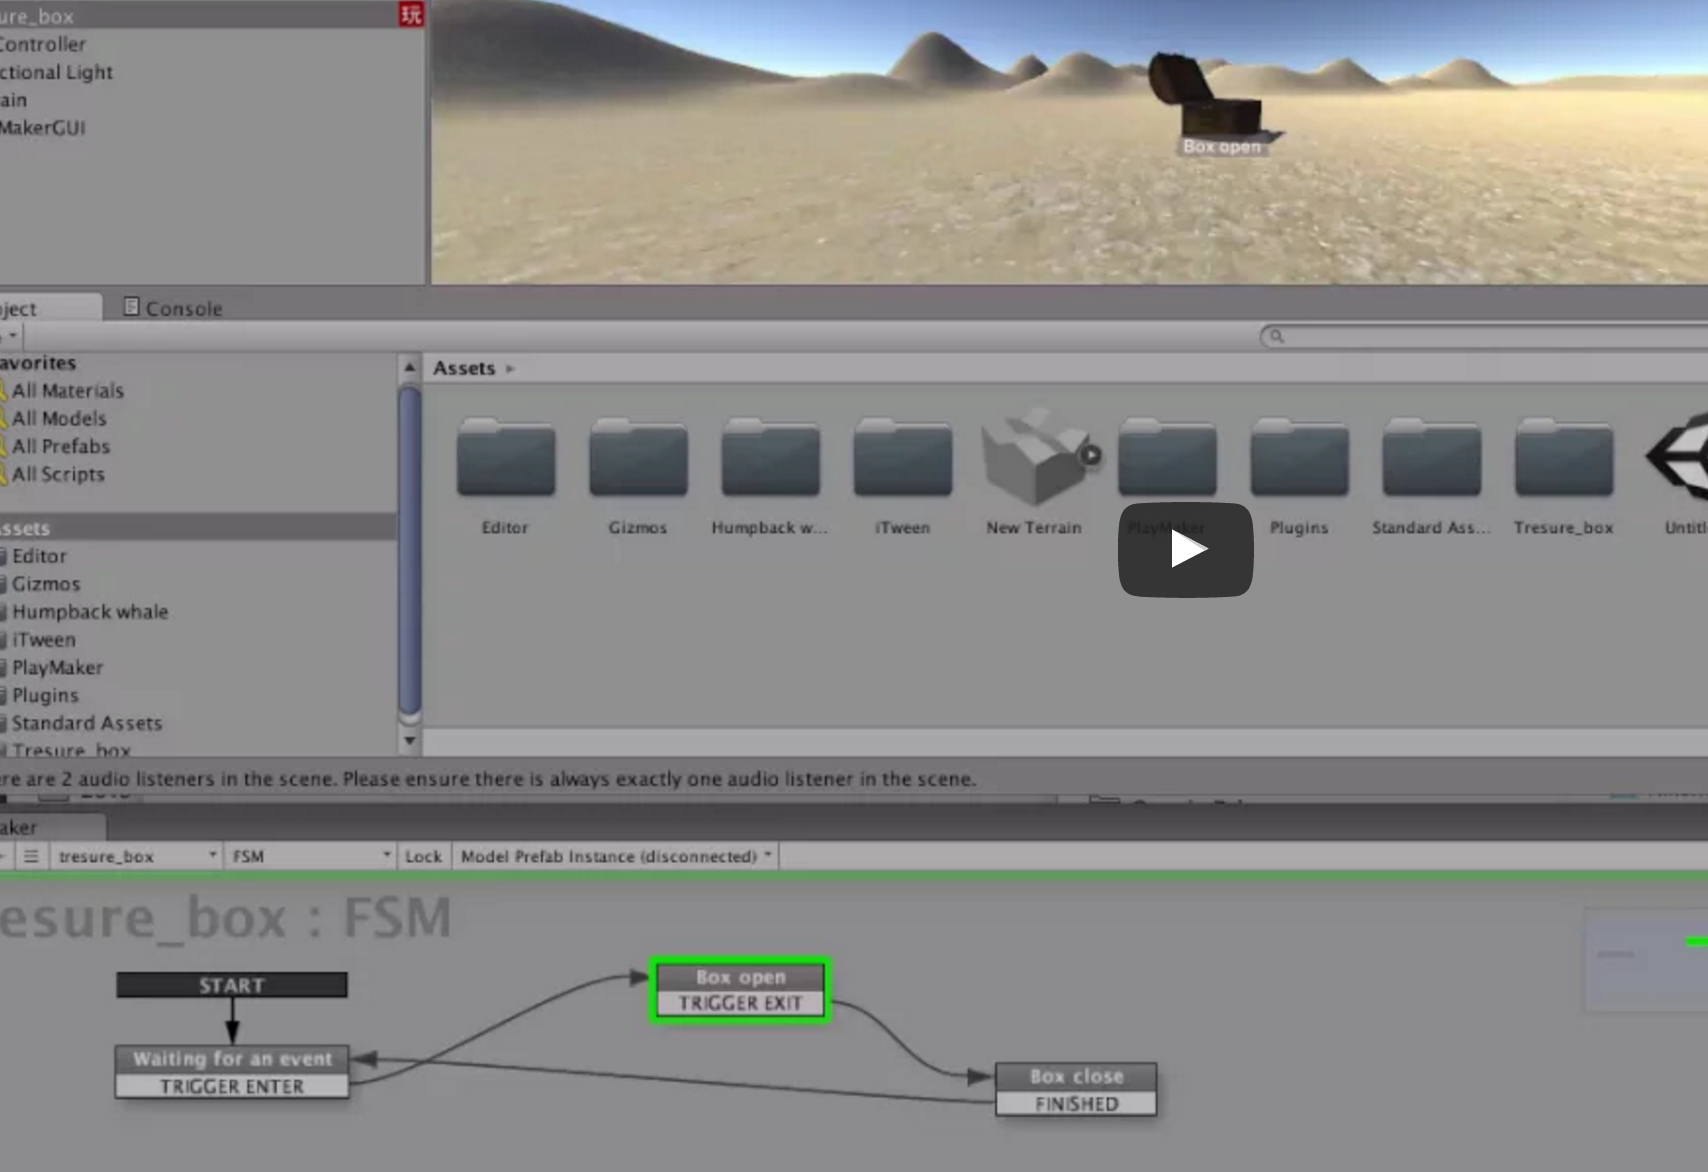
- With the treasure box selected, right-click in the Playmaker window and choose Add FSM.
- Right-click again and choose Add State. Do this twice to add two states so that you have a total of three states (the initial state and two others).
- Give the three states names that reflect what the state is about (for example, "Waiting for trigger," "Open" and "Close.")
Add transition events
- Right-click each state to assign a transitional event. The transition reflects what needs to happen in order to progress to the next state. Note that the terms Transition and Event are used interchangeably in the interface.
- The first state is simply waiting for a trigger to be entered, so choose Add Transition > System Events > Trigger Enter for that state.
- The second state will remain in force until the collider is exited, so choose Add Transition > System Events > Trigger Exit for that state.
- The third state needs to automatically return you to the original starting state regardless of what happens. For that, choose Transition Event > Finished.
- is waiting for a trigger to be existed.
Add Actions
- To add an action, click on the state you want to assign an action to, then click the Add Action button at lower right of the window.
- This opens the Action Browser. You can search or browse.
- Find what you want, such as Play Animation. Add and then close the action browser.
- Playmaker will display red warning text telling you that you need to add an animation. Just click the red text and it will find it and add it for you. You can verify by clicking on the object, looking in the inspector window and making sure there’s an Animation component there. NOTE: The component is Animations, NOT Animator, which is different!
- Now, open the Animations dropdown. Notice that the number of animations for the box is 0. Change this to two, because we want to add Open and Close. Two elements, Element 0 and Element 1, show up.
- Then click the circle with a dot next to each element and select box_close. Do the same for Element 1 and select box_open.
- Now we need to assign events that trigger state changes.
Connect the States
- Use the left mouse button to link each state to the next state, and the final state back to the original start state. Now when you select the treasure box and move toward it and away from it, the box will open and close like a pac-man.
-----
Key Terms
States - This grey box houses the actions you want to add for specific objects. Add it within the the Playmaker window via a right click.
Actions Browser - Specify the type of interactivity you want to add to your scene. Check the Playmaker website for a list of possible actions.
Event/Transitions - Acts as a bridge between states. Transitions specify what state should be activated next after a specific action. Create a new Transition within the Events tab within the Playmaker window. Add it to a state via a right click and drag and click between states to form a bridge
Other things you can do
- Remove labels: Click on the FSM tab and uncheck “Show state labels in game view."
- Start states — you can right click and choose Set as Start State. This is the state the object will always start as.

COMMENTS